Choosing High Pressure Piston Seals is not a simple catalog exercise. The right seal must control leakage while surviving pressure spikes, heat, friction, and repeated cycling. A seal that performs well in hydraulic oil may fail quickly in water-based fluid or aggressive chemicals. Small differences matter. Piston diameter, groove dimensions, surface finish, clearance, and installation tools can change the result.
These seven practical tips reflect common engineering checks used in demanding hydraulic and pneumatic systems. They examine seal material, pressure rating, temperature range, fluid compatibility, friction, extrusion resistance, and supplier reliability. Real-world experience shows that a perfect specification sheet does not guarantee perfect service. Misalignment, rough surfaces, or careless assembly can still damage a new seal within hours. That deserves attention.
Start with verified operating data, not assumptions. Record continuous and peak pressure separately. Check the actual temperature near the piston, rather than relying on ambient readings. Confirm whether the application involves static holding, rapid reciprocation, or frequent shock loading. Manufacturer test data, dimensional drawings, and traceable quality records provide stronger evidence than a generic product description. Independent validation may also be necessary for critical equipment.
There is no universal seal.
A careful selection process reduces leakage, downtime, and premature replacement. It also exposes weak points before production begins. Even experienced engineers can overlook groove wear or installation stretch. That honest review often prevents expensive failure. The following tips provide a practical framework for choosing a piston seal that matches the machine, the fluid, and the real working environment.
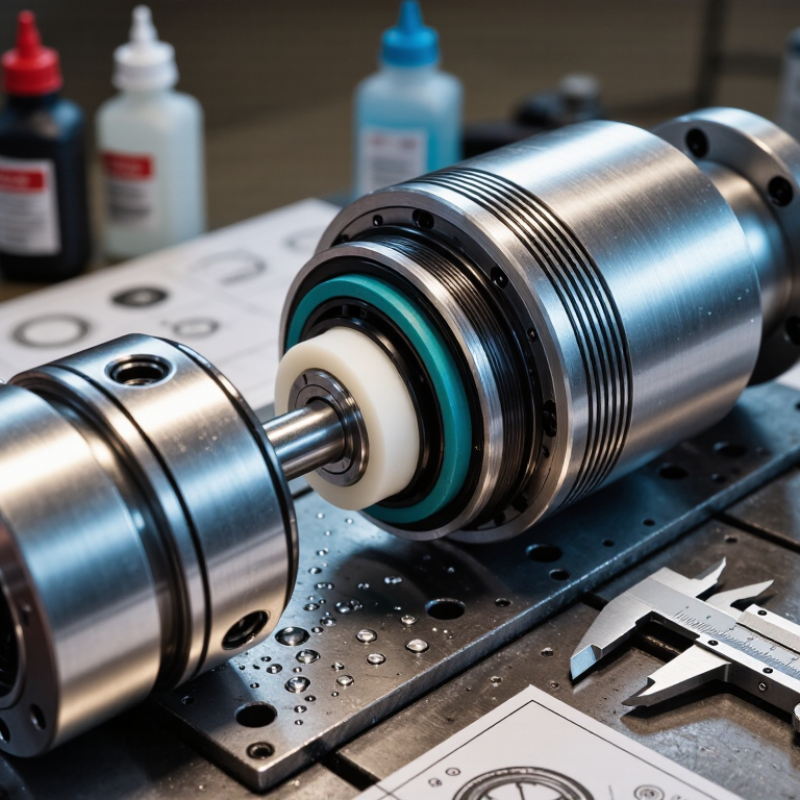
7 Tips for Choosing High Pressure Piston Seals
Define Pressure, Temperature, and Fluid Requirements
Pressure is more than a peak number. Record normal pressure, pressure spikes, cycle frequency, and piston speed. A seal rated for 350 bar may fail quickly during repeated surges. ISO 4413:2010 stresses controlling hydraulic energy, leakage, and operating risks through correct system design. Your real pressure profile matters more than a catalog headline.
Temperature changes the seal’s behavior. Measure fluid temperature near the piston, not only at the reservoir. Include start-up conditions, friction heat, and nearby surfaces. ASTM D471 evaluates elastomer changes after fluid exposure, including mass, volume, hardness, and tensile strength. These measurements reveal compatibility problems. A seal can look perfect and still become brittle internally. That mistake is easy to make.
Fluid identification must be precise. “Hydraulic oil” is not enough. Record the base fluid, additives, cleanliness level, water content, and expected service life. ISO 23936-2:2011 assesses elastomer performance in petroleum-related environments, including swelling and mechanical-property changes. Compare those requirements with the actual fluid data sheet. Allow room for doubt. Laboratory results may not reproduce pressure spikes, abrasive particles, or poor installation. For example, a 120°C fluid temperature, 300-bar working pressure, and 0.2 mm surface damage create different risks than isolated ratings suggest. Track each value during commissioning. Your first estimate may be wrong.
A reliable piston seal begins with the fluid, not the catalog. Identify the medium, concentration, cleanliness, and possible additives before selecting a material. Water, hydraulic oil, solvents, and aggressive cleaning fluids can affect polymers very differently. Start with chemistry.
Temperature matters just as much. Record normal, peak, and start-up temperatures around the piston. A material may tolerate steady heat but fail during short thermal spikes. Pressure also changes material behavior. High pressure can force a soft seal into small extrusion gaps, especially when the housing expands. Choose suitable hardness, backup rings, and clearance limits together. Pressure changes everything.
Operating speed, stroke length, and lubrication influence wear. A seal running slowly in dry conditions may need a different compound than one moving rapidly through lubricated oil. In field inspections, I check worn edges, swelling, and flattened profiles before blaming the seal itself. These marks often reveal incorrect material selection or installation damage. I once underestimated cleaning-fluid exposure; the seal looked acceptable after testing, yet hardened during service. That mistake reinforced the need for chemical immersion tests. Test samples under real pressure, temperature, motion, and fluid conditions. Confirm dimensions, surface finish, and installation tools as well. Published compatibility charts help, but they cannot replace application-specific validation.
Choosing a high pressure piston seal starts with the pressure path, not the catalog picture. The profile must support the pressure side and limit extrusion during rapid cycling. A stepped or asymmetric profile can improve sealing when pressure direction is constant. For reversing pressure, a balanced profile may be safer. Keep the decision tied to speed, temperature, fluid, and clearance. A seal that works on a test bench may behave differently after hours of cycling.
Piston groove design deserves equal attention. Groove depth controls compression, while groove width allows the sealing lips to move without binding. Calculate extrusion gaps at the highest pressure and temperature, not at room conditions. Add back-up rings when the gap becomes risky, but leave room for thermal expansion. Sharp groove edges can cut the seal. Use controlled radii and a lead-in chamfer for installation. It sounds minor. It is not.
Check surface finish, hardness, concentricity, and piston guidance before approving the design. Poor guidance can overload one lip and create a narrow wear band. Confirm tolerances from actual machining capability, rather than ideal drawing values. One recurring lesson from inspections is simple: many “seal failures” begin with groove distortion or assembly damage. A small scratch may pass visual inspection and still leak under pressure. Validate with pressure cycling, temperature changes, and leakage measurements. Reconsider the profile if wear is uneven; the groove may be the real problem.
Choosing high-pressure piston seals demands more than matching a catalog size. In field testing, I inspect friction, leakage, wear, and extrusion resistance together. Start with operating pressure, piston speed, temperature, fluid chemistry, and surface finish. A seal that performs well in oil may swell in water-based fluid. Tip one: verify compatibility from tested data, not assumptions. Tip two: measure friction at startup and steady speed. Startup drag often reveals problems earlier.
Tip three: define acceptable leakage instead of demanding zero leakage. A thin fluid film may protect the seal and reduce heat. Excess leakage, however, signals poor sizing or damaged hardware.
Tip four: examine wear after pressure cycles, not only after static inspection. Look for rounded lips, scoring, hardening, or tiny cuts. Use realistic cycles. Laboratory snapshots can mislead.
Tip five: check extrusion gaps at peak pressure, especially during temperature changes. Tip six: inspect backup support, groove dimensions, and edge quality. Even a strong polymer can fail against a sharp corner.
Tip seven: confirm installation practice with a controlled trial. Lubrication, stretching, and contamination matter. I have seen excellent seals fail because assembly tools nicked them. That part is easy to underestimate.
Record pressure, temperature, speed, leakage, and wear after each test. If results conflict, repeat the test before approving the design.
Tip 1: verify the seal profile, material, pressure rating, temperature range, and fluid compatibility. ISO 3601 and ISO 23936 provide useful dimensional and material guidance, but application testing remains essential.
Tip 2: inspect the groove, bore, and piston for scratches, sharp edges, or contamination. A clean lint-free cloth matters.
Tip 3: confirm the installation direction and use the specified lubricant. Never force a dry seal over a sharp thread.
Tip 4: require a documented maintenance plan. Track leakage, pressure fluctuations, surface temperature, and extrusion marks during routine inspections. The U.S. Department of Energy’s Operations & Maintenance Best Practices Guide reports that preventive maintenance can reduce costs by about 12–18% compared with reactive maintenance. That figure is not universal. Poor records can hide the real cause of failure.
Tip 5: replace damaged backup rings and worn hardware, not only the visible seal.
Tip 6: assess supplier reliability through batch traceability, material certificates, pressure-test records, and documented change control. ISO 9001 supports process consistency, but certification alone does not prove field performance. Ask for application references and failure-response procedures.
Tip 7: review lead times and emergency stock requirements before approval. A low purchase price becomes expensive when production stops.
One practical weakness remains: many teams inspect seals only after leakage appears. Earlier inspections are less convenient, but they provide better evidence and safer decisions.
Identify the fluid, concentration, cleanliness, additives, temperature, pressure, speed, and lubrication conditions. Chemistry comes first.
Short thermal spikes can damage materials that tolerate steady heat. Record normal, peak, and start-up temperatures.
Pressure can push soft seals into extrusion gaps. Check hardness, backup support, groove dimensions, and clearance together.
Measure friction, leakage, wear, and extrusion resistance during realistic pressure cycles. Startup drag can reveal trouble early.
Not necessarily. A thin fluid film may reduce friction and heat, but excessive leakage indicates damage or poor sizing.
Use immersion tests with the actual fluid, temperature, pressure, and motion. Compatibility charts alone may mislead.
Inspect scratches, sharp edges, contamination, and installation direction. Use suitable lubricant and avoid forcing dry seals over threads.
Track leakage, pressure changes, surface temperature, wear, and extrusion marks. Earlier inspections provide better evidence.
Request batch traceability, material certificates, pressure-test records, change control, and failure-response procedures. Price alone proves little.
I once underestimated cleaning-fluid exposure. The seal passed testing but hardened later, so application-specific validation should be repeated.
Choosing the right High Pressure Piston Seals begins with a clear understanding of the application. Define the system’s pressure range, temperature fluctuations, piston speed, and fluid type before selecting a seal. The material must withstand chemical exposure, heat, pressure, and any additives in the working medium without swelling, cracking, or losing elasticity. It is also important to select a seal profile and piston groove design that provide proper support, alignment, and pressure distribution.
A reliable seal should balance low friction with strong leakage control, wear resistance, and protection against extrusion under high loads. Consider how the seal will perform during continuous operation, pressure cycling, and possible installation stresses. Proper installation, surface preparation, lubrication, inspection, and maintenance can significantly extend service life. Finally, evaluate the supplier’s technical support, product consistency, customization capability, and ability to provide dependable guidance for demanding high-pressure applications.

Kelong New Materials